Restoration methods
A Lightbulb-Based Short Circuit Indicator and Over-current Protector
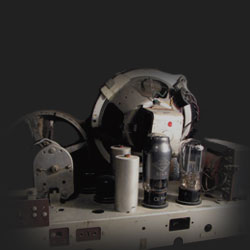
Author: Warren ParksWhether it's that new untried set that you just brought home from the auctions, or that chassis that you just re-capped, who hasn't felt some apprehension when reaching for the power switch for the first time. This simple project will help ease that apprehension, and might just prevent the serious damage caused by a short circuit.
Antique radios very often have deteriorated wiring and components that can short circuit. Unfortunately, it's difficult to be absolutely certain about that new set's safety, especially if you consider that it probably had an electrical failure before it went into storage so many years ago. Radios should only be plugged into an outlet after a thorough inspection verifies that it is safe to do so. Unfortunately, it is often difficult resist the temptation before everything can be tested. Shorted power transformers, tubes, or capacitors can also be difficult to test without the right equipment, and are easily missed. For this reason, this simple short circuit detector and current surge limiter should be used to reduce the chance of damage to your new treasure or yourself. It is simple to build, easy to use, and can be quite useful!
The radio that you want to plug in looks like a resistance to the wall outlet voltage. Using Ohm's Law, if the circuit is damaged and has too little resistance, a "short", a huge amount of current will be allowed to flow when plugged in. This surge current is limited to 15 Amps by the main breaker, but before this trips, a lot of damage may be done to your set, or to YOU!
This protector circuit limits the amount of current that can flow by placing the resistive lightbulb filament in series with the circuit under test. The neat thing about this is if the radio power supply is shorted, the lightbulb will just shine brightly, limit the current, and dissipate almost all of the otherwise destructive power. Another cool thing about this tester is that with different wattages of lightbulb (different filament resistances), you can get a rough feel for how much power the set is consuming. This is always a good safety check, and might help to indicate an electrical problem that could cause the set to draw more current than normal.

The multi-range tester is constructed as indicated in the diagram, using the following parts:
- A 6 foot or shorter plastic extension cord.
- A three-way table lamp socket with rotary switch.
- A 30-70-100 Watt three-way incandescent bulb.
- Some electrical tape and basic tools.
- That's It!
The extension cord should be cut to leave about 18" of cord attached to both the plug and outlet ends. One wire from each end is connected with a splice, and the other two wires connected to the two screw terminals inside the bulb socket. This will put the bulb filament in series with one side of the extention cord. I got a little fancy with mine, and inserted the wires to be spliced into the socket base first. The spice was soldered and well taped, and hidden away inside the base to stay out of harm's way. Be sure that all of your wires are trimmed neatly, and all connections are firm and secure. Check that there are no frayed strands of copper wire coming off of the socket screw terminals, and that the splice is well taped.

With the three way bulb installed, it's time to try it out. Plug the cord end into a wall outlet, and plug one of your table lamps with a 60 or 75 Watt incandescent bulb into the outlet end. With the table lamp to be tested turned on, rotate the switch on the tester socket through it's ranges.
As you rotate the tester switch to the right, it will click through the OFF, 30W, 70W, and 100W positions in that increasing order. With the switch set to off, both bulbs will be off. In the 30W position (the highest filament resistance), the tester bulb will glow much brighter than that of the lamp. This is because a much higher percentage of the wall voltage is dropped across the higher resistance of the tester filament. As the tester bulb is switched to 70 Watts, the wattage closest to that of the table lamp, both bulbs will light to about the same dark yellow brightness. This means that the two bulbs have roughly the same resistance, and are sharing the voltage more or less equally. When switched to the 100 Watt position (the lowest tester resistance), the table lamp should be lit much brighter than the tester.
With a little practice with several different bulbs, you can soon get a pretty good feel for how much current the load under test is pulling. If the load were a dead short, the bulb would glow brightly for all three ranges. If the load is an open circuit, then the bulb will not light at all.
| Most radios list on the label what the power consumption is in Watts. If not, most radios fall in the following ranges:
|

|
It should be noted however, that radios with power supply transformers will appear to be consuming more power with this test than they are actually rated to. I have noticed that a perfectly functioning 30 Watt radio with a transformer may seem to be drawing more like 50 or 60 Watts. The point here is not to make an accurate measurement (as there are far better ways), but to simply indicate if a serious power supply problem exists.
Another thing: your radio may or may not function properly while on the tester. All of the vacuum tubes should glow at least a little within one minute, nothing should smoke, and some kind of sound should be heard from the speaker. Keep in mind that the filaments may take much longer to warm up while on the tester. The bulb may glow a little brighter than expected at first, then it will dim down some as they begin to glow. If they do not seem to be glowing after a minute, you should try switching up to the next setting, and waiting for a little while longer. IF still no glow, you probably have a problem.
Be careful, have fun, and this will save you from a toasted radio!
Add comment:
| Name: | ||
| code protection:* | ||
| email:* | ||
 Main
Main- About
- Antique radios
- Old Radio Collecting
-
Radio repair links
- Old Radios Troubleshooting Quick Guide
- Tube radios repair technology
- If you receive the parcel with an old radio