Restoration methods
Paper capacitor restoration
It's a well-known fact that electronic parts alter their electric characteristics during prolonged storage. The paper capacitors are not exception. These capacitors are often used in domestic household radios from 1950 - 1960-ies. It is impossible to find such capacitors, not previously used, because old stocks are not.The main criteria by which we can determine that the capacitor is defective, it is significant in two to three times the capacity, as well as a large leakage current caused by Leaking capacitor. Sometimes leaks lead to electrical breakdown in the capacitor. If the first two faults can be combated by capacitor boiling in hot wax or paraffin, then the internal breakdown of the capacitor definitely needs to be replaced. If the basic requirement during the restoration of the old radio is the maximum preservation of the authenticity, so if the unit is not to be used, it is best to leave the faulty capacitors in place.
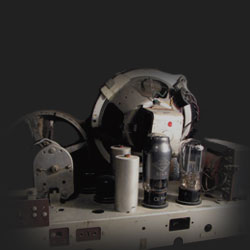
If the equipment will be operated by direct its purpose, the faulty capacitors should be replaced. Installation of modern, suitable to the condenser is not the best way to replace, as is violated not only the general authenticity, but also visual. These capacitors will look like a foreign body. A better way, I think a way to replace the old buildings with the use of capacitors, which will not affect the visual authenticity, but it is not bad. How to do this will be shown by the example of the capacitor CB (more CBF 2 x 0.75 mkF 170V ~). This capacitor in this device acts as a phase-shifting capacitor with a total capacity of 1.5 mkF and is mounted on the bottom side of the player type IIIEPU-9. Both sections on 0,75 mkF, to obtain the required capacity of 1.5 mkF are connected in parallel by means of external jumpers. This feature will be used for the repair of the capacitor.
For restoration of paper capacitor we will need the following items:
- Modern capacitors of appropriate size, capacity and operating voltage. Available in stock capacitors were chosen as follows:
-
a) capacitor MKT capacity 1.0 mkF 250VAC
b) the capacity of the capacitor MKT 0,47mkF ~ 250V - Economic candle wax. You can buy at the hardware store. If you do not find the candle wax, then come up and paraffin candle.
- Solid copper, tinned wire. The wire should match the diameter of the wire terminals of the capacitor, in this case 0.8 mm. If the wires of this diameter is not found, you can use the findings of the capacitor to be repaired, and internal connections to perform any suitable wire.
- Segment thick-walled metallic tube with an outer diameter approximately equal to the inner diameter of the paper cup capacitor edge rolling.
- Tools: vise, hammer, pocket knife, tweezers, small pliers, a brush, a soldering iron.
- Heater: You can use an electric hot plate or individual heater, as well as the normal household gas stove.
- Capacity to melt the wax: metal can fit any of the appropriate size.
Sequence of operations:
| 1. Carefully use a knife, tweezers and a small pair of pliers remove the wax pouring end and flared paper cup capacitor on the one hand, smoothing out the edges evenly rolling. | 2. With the segment of the metal tube and a hammer gently knock the inner contents of the beaker. If this can not be done with a little effort, the capacitor requires slightly warmed over the stove, but do not bring to the melting wax casting. |
3. Separate the knife and remove the side cover of the capacitor. Conclusions capacitor must first be cleaned of excess solder and straighten if their ends were suites in rings:  |
4. Mount the new capacitors and one of the side covers so that they fit in a glass on a remote location. In this case, using the fact that the capacitor in the circuit EPA used in parallel operation of both halves for easy mount them as follows:  |
5. melted wax on the tile to a liquid state:  |
6. Hold capacitors mounted in a vise and put on a glass on them. Carefully centering the capacitors so that the pin assignment corresponds to the original, carefully pour a glass of melted wax. The cast should be brought to a level that the top of the wax can be placed a second lid and make the rolling of in the old seam.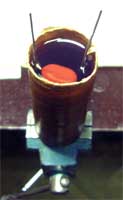 |
7. After the wax hardens completely, install the second side cover, fixing her with a thin layer of melted wax:  |
8. Gently roll second sides of the capacitor, and then with a brush coat with joint covers and rolling hot wax. Form the terminals of the capacitor in accordance with the original.  |
| 9. Check the condenser for compliance with the required capacity, then you can install it in place. As parallel connections have been made inside the capacitor, external jumper became redundant, and could be removed. But to preserve the visual authenticity should not do this... |
Author: V.M. Pavlov
Add comment:
| Name: | ||
| code protection:* | ||
| email:* | ||
 Main
Main- About
- Antique radios
- Old Radio Collecting
-
Radio repair links
- Old Radios Troubleshooting Quick Guide
- Tube radios repair technology
- If you receive the parcel with an old radio