Recovery technology
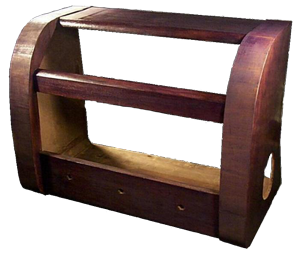
Radio cabinets veneer restoration
Old radios: How to fix veneer that is lifting
(Method was written by Floyd Sense)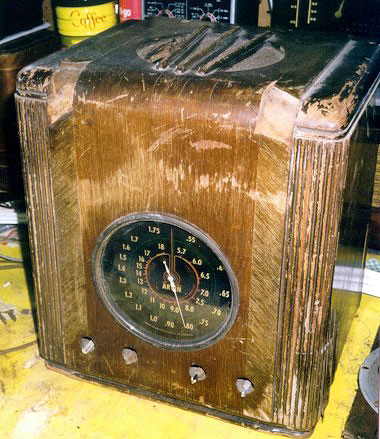 Use putty only if the chip is in an inconspicuous place and you'll be using a toner spray over it. You could then hide it pretty well. If it can be easily seen, I'd go with replacement veneer. Be aware that veneer comes in more than one thickness and of course in any kind of wood you want.
You'll want to match both the wood type and thickness. I've done some patches that are practically invisible after the cabinet is refinished. You should always cut the veneer patches at an angle. Cuts at right angles to the grain will always be visible.
So, say you have a chip in the veneer that's maybe 1/4 by 1/2" and it's on the front or rear edge of the cabinet. You would first cut the edges of a triangle shaped area, which includes the 1/4 by 1/2 inch area. The base of the triangle would be the edge of the cabinet, so you've made the veneer cuts at an angle across the grain. You then carefully remove the upper layer of veneer in the triangular area with a pen knife. Next, choose a matching thickness of veneer and cut it to fit the triangle shaped area you just cut out. To get the angle right, trim with a razor blade and straight edge until the patch can be slid in tightly. Then, mark the edge on the patch piece and cut it to that dimension with the razor blade. You can now use a contact cement or a wood glue to glue the patch in place. You want to make sure to apply pressure across the entire area of the piece. For small patches on a curved surface, I use a steel ruler, bent around the bend over the piece and secured with clamps.
Don't try to start with a piece of veneer that's too thick and then try to sand it down flush after you've glued it down. You'll have a hard time hiding the change that the sanding makes to the surrounding wood. I know one fellow who obtains all of his patch veneer pieces from junker wooden cabinets. He lets them sit out in the sun and rain until the veneer separates, and then he cuts the upper layer up into pieces, discarding damaged areas. That gets you some real good veneer, of typical thicknesses, for just about nothing!
How to fix veneer that is lifting
Where the effects of water are evident you'll have to deal with it's associated problems this way. Lifted or bubbled veneer can often be reset by placing a piece of wet cloth over the damage and using a hot iron to force the moisture through the veneer back into the cabinet. If done properly it will re-melt the original glue and re-stick it back into place. If that doesn't work, use a sharp blade to lift the loose veneer and brush under it "pearl glue", which will re-stick it in the original manner. For blisters, follow the grain of the wood and make an incision big enough to "paint" in the pearl glue to re-set it. If then, the veneer still remains lifted, use the iron and wet cloth over the veneer and that should do the job.
How to glue veneer back down
To refix veneer in a traditional manner, there is a tried and proven method for a more effective adhesion than contemporary fixatives such as P.V.A.
Pearl glue, is an adhesive extracted from boiled animal remains, and is filtered and poured into tiny milky white globules which resemble, (yes, you've guessed it!) pearls! Pearl glue can be obtained from most "old fashioned" hardware stores, not the big D.I.Y superstores.
 You can buy a small bag of the stuff very cheaply, and for wood repair this is fast and effective. To use the glue, firstly find a stout old pot or tin that won"t fall apart under heat. Pour in a small handful of the resin, and a little water to help melt it. Then put the can or pot into an old saucepan and fill the pan with water about halfway in height to the size of the pan. Put the assembled items over a gas ring, and after a few minutes the water will start to boil. Check to see if the glue is melting into an opaque liquid by stirring it. Very soon you should have a slightly thickened liquid, (not too watery) which is ready for use.
Using a suitably sized (big enough for the work in hand) paintbrush brush onto the repair area, and then place the loose veneer (slightly moistened) onto the glued area. Use slight, but firm pressure to push the veneer home and remove with a damp cloth any excess glue that oozes from the edges of the repair. Leave preferably overnight to completly dry out. Although the repair will seem quite firm and dry after half an hour or sooner, it won't have hardened properly, and any heat such as friction though rubbing will re-melt it causing the repair to fall away.
When dry, the veneer can be lightly sanded using a "0000" grade sand paper, (or "fine", if you buy from the superstores) to smooth out any slight imperfections. Now, if you are having to replace from scratch any sections of missing veneer, firstly (doh), find an exact veneer which matches, and then cut first a "V" or rectangular incision on the affected area to give a crisp area to glue on. As you cut, use a very sharp stanley type knife to slice it at a right angle. Measure and repeat the same for the new piece and you'll find both pieces will overlap across the cut making the replacement look seamless when it is finally glued into place. You can then, (as described) rub both sections clean, and you should end up with a very precisely matched repair.
When cutting the replacement also try to match the grain of the original to ensure the "seamless" finish. If you find that there are slight "cracks" where both pieces are brought together you'll have to find a woodfiller which is stained to match the particular wood you'll using. Many cabinets are veneered either in mahogany or oak. More difficult veneers will be rosewood or birdseye maple. If you want cheap veneers, check out your local furniture factory for off-cuts, or visit a specialist restorer who may supply you with a little veneer from stock.
Add comment:
| Name: | ||
| code protection:* | ||
| email:* | ||
 Main
Main- About
- Antique radios
- Old Radio Collecting
-
Radio repair links
- Old Radios Troubleshooting Quick Guide
- Tube radios repair technology
- If you receive the parcel with an old radio